home

Showing posts with label DIY. Show all posts

Tuesday, August 23, 2011

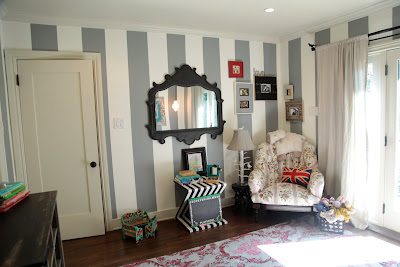
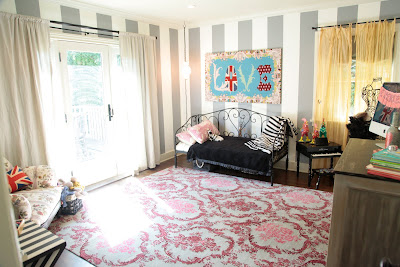
white stripes

{finished product}


1. take everything off walls, patch holes... and if your ones of "those" then you can tape the floor, ceiling, windows, cover all the furniture, etc... i don't have the patience...


2. paint all walls your base color.


3. measure and tape. ( i did 10 inches ) remember to place tape outside the area to be painted... also if something seems off it probably is... don't just keep going ( not that i did that... ) but trust me it will save lots of time if you figure it out right away.


4. paint the stripes with your other color .. or same color different sheen or wall paper... whatever the options are endless.


{ my lil painter }


if i can do it you can do it... enough said...

xo
d

Wednesday, July 27, 2011

tangled

there is nothing worse then trying to rush out of the door and you grab a necklace to throw on and six others come along .... also two bracelets, a ring and half an earring. just because you haven't found the perfect way to display your baubles doesn't mean you should just let them tangle up in a drawer.. so here are 5 things you probably have around the house that you can use until you make up your mind:

{rings:meat thermometer}

{earrings:cheese grater}
ps this is great for travel.. and the "zest" part holds even the teeniest of studs

{bracelets: paper towel holder}

{necklaces:shower curtain rings}

{everything:spool holder}
ok ok so this one may not be laying around the house but its cheap and easily found at any craft store and it works perfect for everything


xo d

Saturday, July 23, 2011

you're so shady.... diy lamp shade

having just moved, we had a few lamp shades that didn't quite make it to point b.... so instead of just tossing them i decided to revamp. sooo if you've got a lamp shade that needs some love here ya go:

{finished product in the daylight}

{what you need: lamp shade, scissors, hot glue gun & glue, lace/chiffon/fringe trim...or whatever you like}

{ start gluing }

{ i made about 6 "base layers" first }

{then went in between with different fabrics}


{at night}
xo d

Sunday, July 3, 2011

Party in the USA


This past month, Roxanne and I had the pleasure of helping Planet Blue create their amazing summer campaign + lookbook
PARTY IN THE USA. We crocheted beachcruisers + made dreamcatchers out of recycled bicycle wheels. . . such a fun way to kick off the summer! Head over to the Planet Blue store nearest you for a chance to win a one-of-a-kind Cruiser {see pics below}


{Planet Blue Lookbook "Party in the USA"}
click here to see inspiration pics. . .


Photographer: Zoey Grossman
Hair/Makeup: Adrienne Herbert


{Planet Blue Venice, CA}


{DreamCatchers}


xoxo
Laura&Roxanne

Garden Cinema


Now that summer has finally come, I want to spend these warm nights outside watching my favorite movies with my family +friends. As a child, I would look forward to the summertime when my family and I would jump in the old station wagon and head out to the drive-in. Homemade popcorn, thermoses of lemonade, m&ms, and tons of blankets would fill the car to make for the perfect movie watching experience.

Since drive-in theaters are a thing of the past, why not recreate those memories today in your own backyard?


{images via DesignSponge}

xoxo Laura

Sunday, June 19, 2011

Father's Day DIY Coasters


In celebration of all the fathers out there that love to enjoy a cocktail or two, here is a simple, yet meaningful gift that is personal+practical. . .

{SUPPLIES: Modpodge, 4 1/2" x 4 1/2" tile, a small brush, and clear Polycrylic }
{STEP 1:} photocopy your favorite pics onto cardstock. I was lazy and used my color printer
{STEP 2:} trim the pics to size + modpodge onto tile
{STEP 3:} once the modpodge is dry, paint a coat of polycrylic onto your pics
I have to admit, this project came about because I bought these stone ice cubes that I thought were neat. But at the same time, I thought to myself "what a random Father's Day gift?" My dad LOVES his whiskey but I realized my gift needed something more personal.

{STEP 4: Presentation is everything! Tie your best ribbon, twine, or rope around these suckers and your gift is complete and sure to impress!}
These were super easy, cost $1 a pop, and turned out better than I expected! I am definitely going to make these more often. . . birthdays, party favors, any holiday really!

modpodge away. . .xoxo laura
Thursday, June 9, 2011

DIY Paper Feathers

Are you as obsessed with feathers as we are? These paper feathers are so beautiful, we had to share!! Check out the complete how-to by Mark Montano . I am definitely adding these to my project to do list. . .

Monday, June 6, 2011

flower child


the best part about spring is the flowers... the best part about flowers is that they are the earths perfect accessory. put one in your hair and you are instantly transformed through sight and smell... enter the flower halo. we chose to make our flower halo using faux flowers just for practicality sake (so we can wear it again and again and again!) and lets face it – its cheaper! however if you’d like to make one using real flowers , for a special occasion , a gift or because its a tuesday.. mosey on over to free people’s blog http://blog.freepeople.com/2011/05/floral-headpiece-how-to/ and they have a great tutorial...anyways

here’s how it goes down:

(metal floral wire, cloth covered floral wire, needle nose pliers, lots of flowers, floral tape: not pictured)


twist two cloth covered wires together to your desired size, this will be the base of the crown


cut the buds from the stems, leaving enough stem (about 1 inch) to wrap the skinny metal around. form bundles, wrapping the metal around tightly, leave extra wire at the end to attach the bundles to the base.


attach to base


continue making bundles and attaching until you've filled your crown... go as tame (one or two flowers for the timid) or wild (fill with huge oversized flowers for those of you who want to make a statement) or you can also just do one big flower! so many choices what is a girl to do???

make them all!


recommendation: do not get a manicure before embarking on this project...


flower halo
once you've finished and tried it on you can wrap floral tape around the ends and or if you have any little pricklies poking you

ps... instead of party hats, we made these for my daughters 2nd birthday party. everyone took them home and i get pictures all of the time of the kids and adults wearing them around town! sweet little twist on a birthday party classic....

xo
dominique